I’m always looking for different ideas to practice in my art journal, and one technique that I’ve been experimenting with this month is Neurographic Art. Neurographic Art was developed in 2014 by Pavel Piskarev, a Russian Doctor of Psychological Sciences and leader at the Institute of Psychology of Creativity. Piskarev’s theory claims neurographics bring to life dormant neuro connections which energize a positive change within the artist. Are you open to trying something that may help to transform fears, or worries, into something calming and beautiful? If so, keep reading—you might surprise yourself with what you are capable of creating!
So what exactly is Neurographic Art? Breaking this down a bit, think of a neuron first. A neuron is a cell that carries messages between the brain and the body. Then add graphics to this process. Graphics are the artists’ use of lines, shapes, pictures, and words. The artwork you create with this process is abstract. It reminds me of something you might see in a science lab under a microscope, but more colorful and vibrant. I’m finding it to be an enjoyable way to practice mindfulness, improve my focus, and a healthy alternative to screen time.
If you already practice journaling, but are hesitant to add artwork to your journaling, let me reassure you that one does not have to be an artist to create neurographic art. The supplies you need to do so are not too cumbersome either, in fact, you may already have some of them at your home. The supply list is simple:
watercolor paper (I used 6” x 8” size sheets, and you can find this at Hobby Lobby)
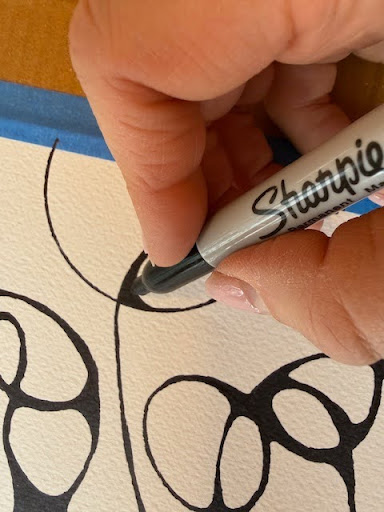
black sharpies, or other permanent markers
watercolor paint and/or colored pencils
paint brushes
painters tape
Optional: coarse salt.
Here are the steps and guidelines you will use to create your own Neurographic Art:
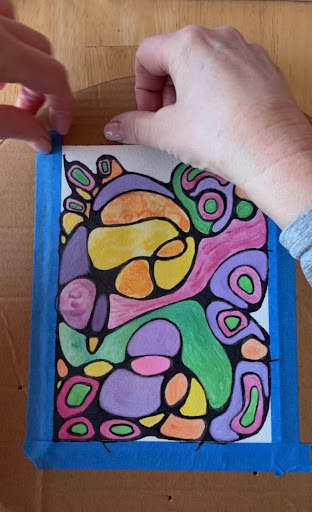
Tape down your water color paper to a table surface, or a piece of cardboard.
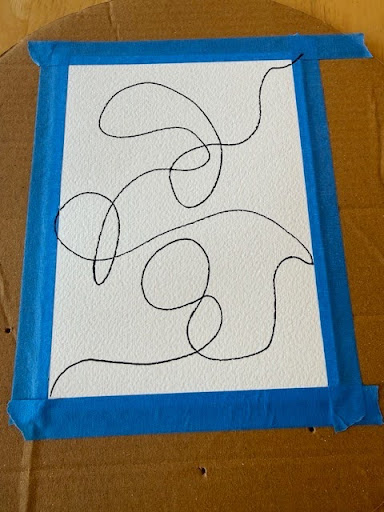
Using a permanent pen or marker, scribble for 5 to 10 seconds focusing on your “challenge.” As you do this, move your arm freely and continue lines to the edges of your paper.
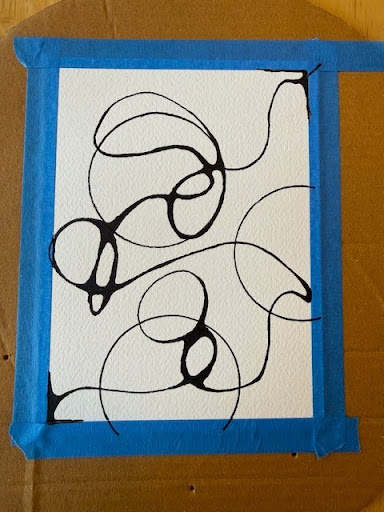
3. Round out corners, turning the cause of your stress into more of a meditative rhythm. The point of this step is to transform your worries, or fears, into a calming feeling. Thus, turning your attention away from your worry by giving you something else to focus your energy towards.
4. After rounding out the corners, then start thinking about your work as a piece of art. You can add more lines, different types of line markings, and shapes (such as circles) to your piece, and then round out the corners that remain after adding these elements. Maybe even add words.
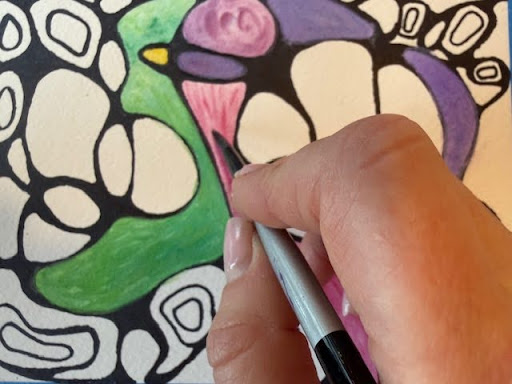
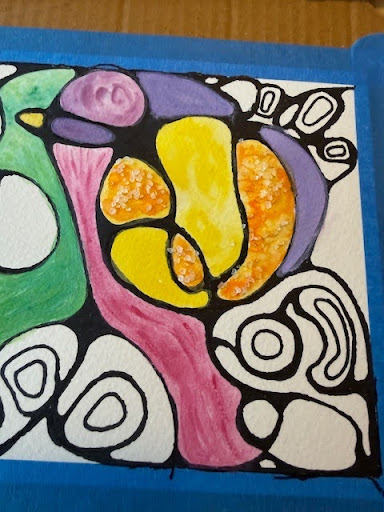
5. Then enhance your Neurographic Art with colors. Watercolor paints and colored pencils work well for blending and adding different values to your piece. Use three or more colors, blend colors light to dark, and try layering. You can even experiment with adding coarse salt to wet paint for different effects.
6. After your artwork is completed, and dry, you can gently remove the painters tape. Then sign your artwork with your name on the front.
To reflect on this process, you can turn your paper over and write on the back what was on your mind as you started this process. Maybe even title it, and date your work. If you would like to journal more about it, possibly write about the process in your journal with these prompts:
Did you enjoy making this piece?
How did you feel while you were creating?
How did you feel after you were done creating?
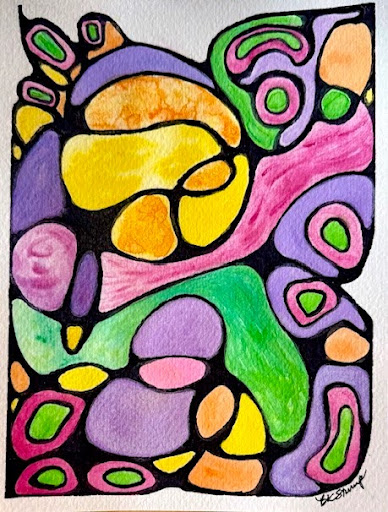
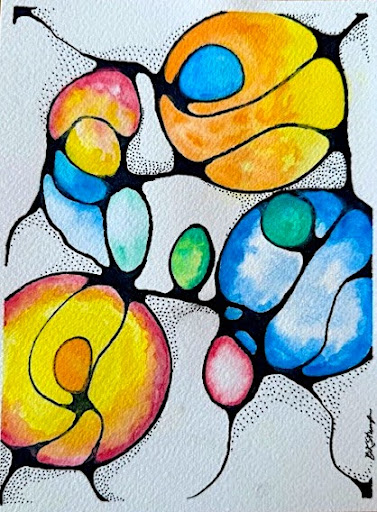
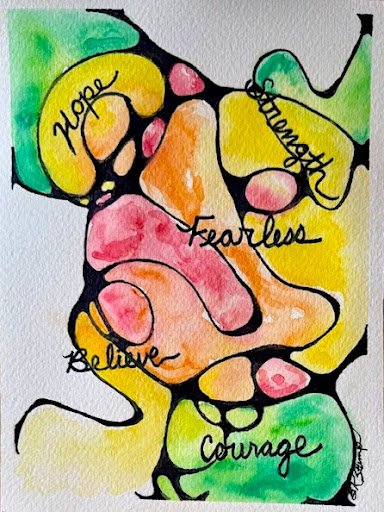
Below are some of the Neurographic Artworks I created this month in my art journal. In the first one (photo 1), I added more shapes, and experimented with coarse salt. The middle example (photo 2), I worked on blending colors, and embellishing with dotted line markings. Finally, in the third example (photo 3), I incorporated words of encouragement.
Barbara K. Stump, MA is an art education consultant and G3 contributing writer.